Stunning Hutch Transformation with Black Paint and Floral Wallpaper

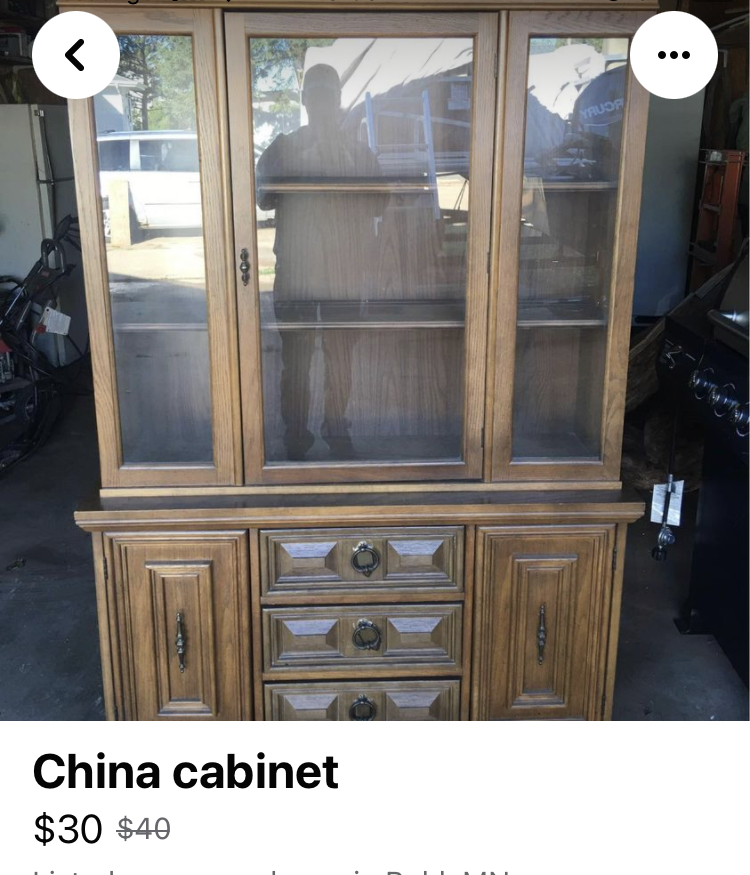
I found this $30 hutch on Facebook Marketplace and knew it had a ton of potential.
First, I removed all drawer and door pulls. Then, I vacuumed the hutch and cleaned it with diluted TSP substitute and a microfiber rag.
Next, I filled all holes from the removed hardware with Bondo. I let it dry for an hour and then sanded it down until it was totally smooth.

I lightly scuff sanded the entire hutch, especially the details that stuck out further than the others. This ensures better paint adhesion.

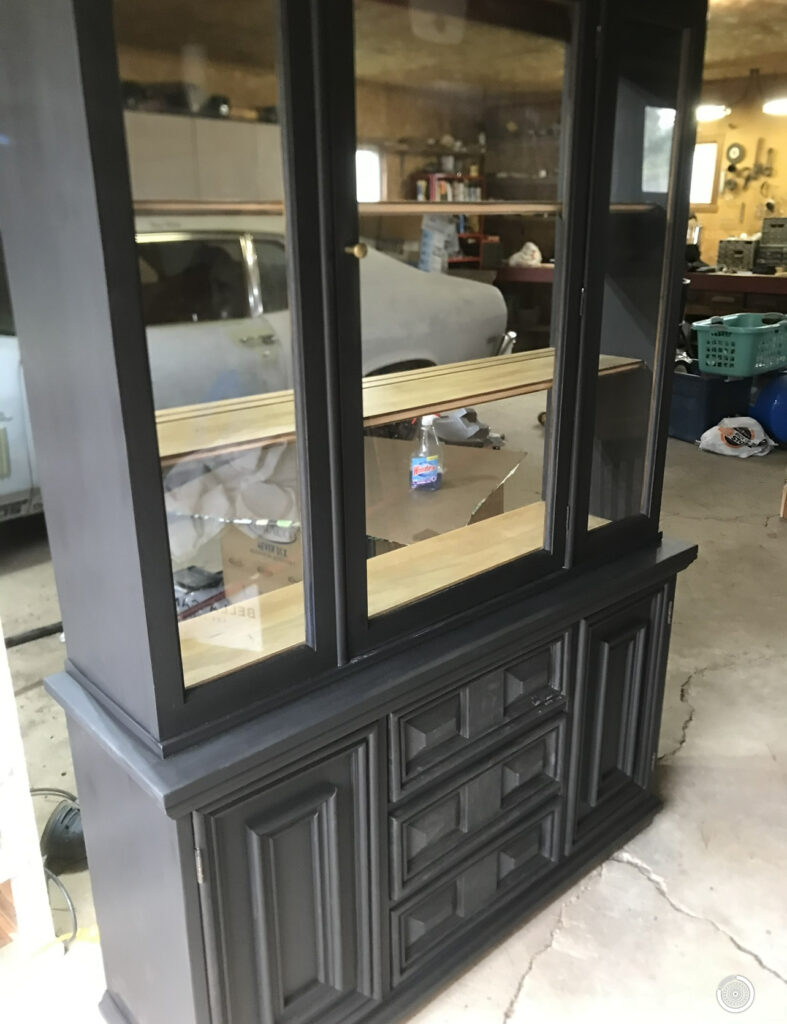
The paint I used was from Melange Paints One in the shade Jett. This paint is a primer, paint, and topcoat all in one. Depending on your piece, you may or may not need to use a primer.

I applied the paint using my two favorite paint brushes, the Wooster Shortcut and the Zibra Angled Brush.
I just barely finished this project with one of the 8 oz jars, but I should have purchased two.
I sealed the piece with furniture wax a week later to really let the paint cure.
For the wallpaper backing, I started by prying the back off of the hutch by removing the staples that held it in place. I used this staple remover. Life changer.
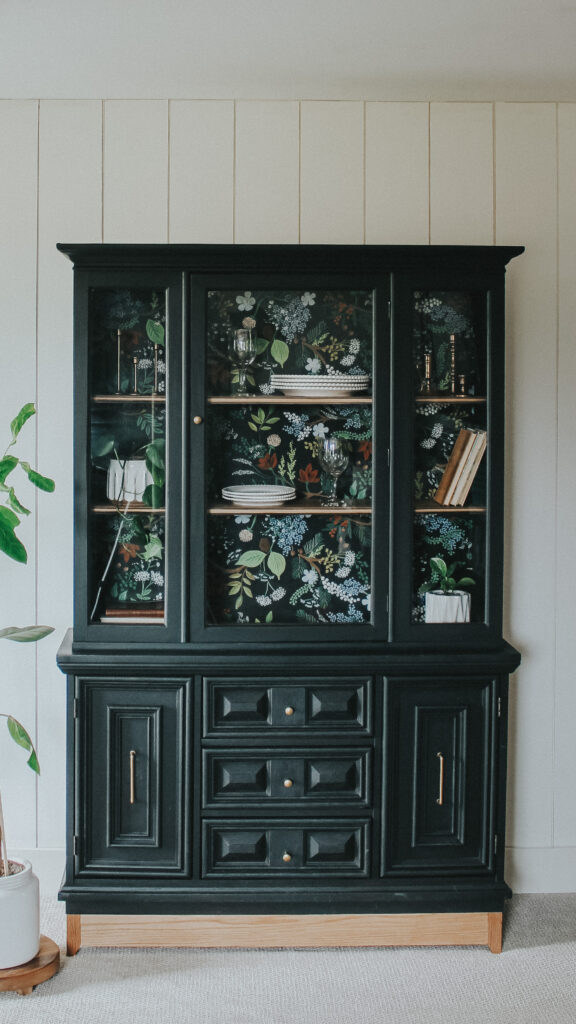
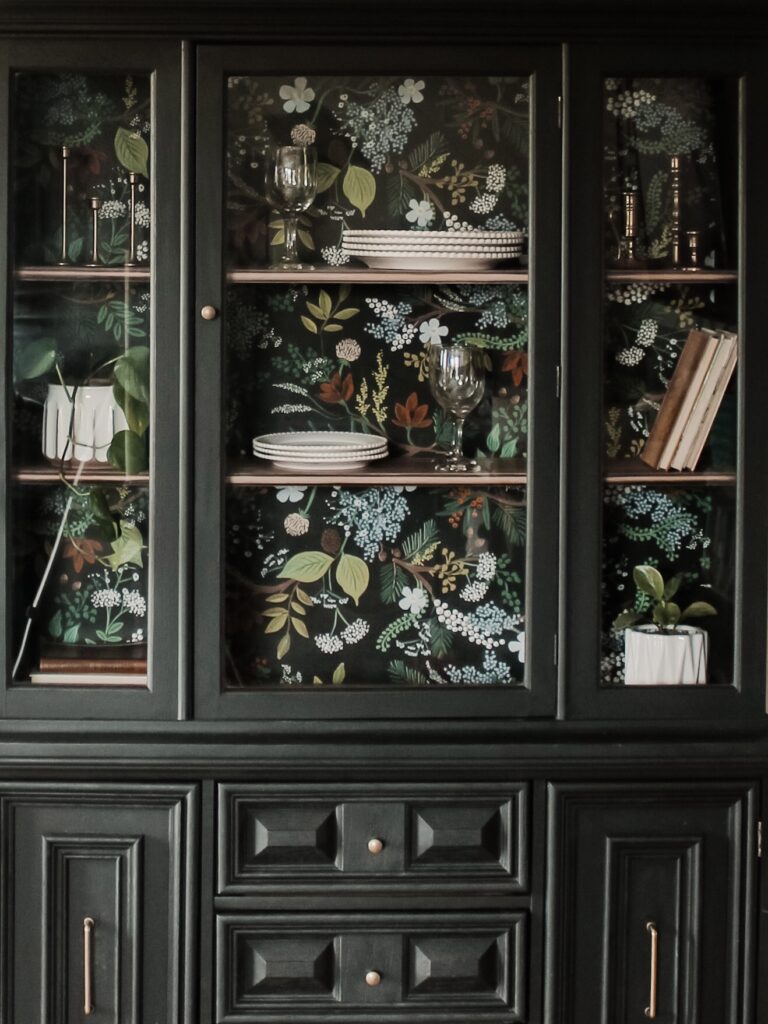
After removing the staples, I applied the peel and stick wallpaper, leaving a bit of overhang on each side. This is York Wallcoverings x Rifle Paper Co. Juniper Forest Peel and Stick Wallpaper.
Here it is in my entryway. Swoon.

After applying the wallpaper to the backing, I reattached it to the hutch with finishing nails every 6 inches.
When applying the wallpaper, I left an overhang that I trimmed down once I reattached the backing.
I lightly sanded as much of the shelves as I could reach and then sealed with Varathane Triple Thick (my favorite poly topcoat!)
I re-drilled my hardware holes where I wanted them placed. I still can’t believe the difference new hardware makes!

I will have to go into greater detail on this in a future post but I added a red oak base to the hutch as well. This really took the look to the next level.
The finished look! My most asked for link is this wallpaper. I am still obsessed.

Check out my other favorite wallpapers in my home…
Or my dining room table makeover!
So clever to take off the back of the hutch to add the wallpaper. I have a hutch project and the shelves are not going to come out without causing damage…so I was about to skip the wallpaper. But now, I’ll have to go take a look at the backing! Genius. Thank you